Search it
Navigation
Recent Comments

A RECIPE FOR DISASTER

I spend a lot of time in the kitchen.  It's a well-oiled machine!  Efficiency is my middle name! 

I enjoy making someone laugh a lot more than I enjoy making someone dinner.  Maybe here I can manage to do both.

Saturday
Sep082012

Preacher Cookies...Sinfully Good (Ironic, No?)

We speak of disasters around here often. Too often, I'm afraid. One thing that I consistently mess up is the waffle.

A waffle. How do you get a good waffle? And going to IHOP doesn't count. I want to make a good waffle! 

I have to tell you, this disaster was a concerted effort. Mike whipped up this batter and then I took over in the kitchen. We concluded that you should not use the same batter for pancakes and waffles. (At least, not this recipe.) 

As difficult as it is for me to achieve culinary greatness, I do succeed when it comes to dessert. 

With this particular recipe, I was confident that the outcome would be good, guaranteed.

A Preacher Cookie. You're curious, right?

The story goes that a long time ago, if you saw the preacher coming down the lane, you could get these cookies prepared before he arrived at your door. They come together very quickly, with ingredients that you will always have on hand. You don't have to bake them, and the most important thing: they are delicious!

Helpers are handy!

Stir, stir, stir the butter, milk, sugar, and cocoa. I know...you already want one of these cookies!

Bring the mixture to a boil, and stir constantly for one minute.

Make sure long hair is up, so it doesn't catch on fire. (Very Important!)

I don't really have anything to say about this picture, except they're cute and sweet (when they are, that is).

And silly, sometimes.

After you stir your butter/sugar/milk/cocoa mixture, add some peanut butter, vanilla, and oats. Then drop by spoonfuls onto wax paper. Voila! 

It is very hard to mess these up; if you are looking for a no-fail cookie, this is it! 

Tuesday
Jun052012

Margarita Pie? Yes, Please!

Just recently, I opened a container of Greek yogurt and discovered that on the inner seal, a recipe was printed. Margarita Pie. Well. I set that aside and knew that Margarita Pie was in my very near future. I finally gathered all of the ingredients (I thought) and decided to make that pie today!

I made some adjustments. We should probably get ready for a mishap.

The first thing I did was juice some limes. I'm trying to remember how many there were...I think 5 good sized ones, and two small ones that were not very cooperative. I ended up with 1/2 cup plus 3 tablespoons, which was just enough for what I needed. The recipe calls for margarita mix (the kind without alcohol added) (I guess...) but that stuff seems so terrible for you. I looked online and found a homemade margarita mix here. It looked tasty and simple - yes! I set the lime juice aside and started on my crust.

The pie recipe calls for a graham cracker crust, which you can buy in the store. Again, I don't like the ingredients in the store-bought crusts, and I had it in my head that I was going to make the crust myself for this pie. (Sometimes I buy graham or cookie crusts from a place like Whole Foods. The graham, from what I remember, is not fantastic.) I did buy graham crackers from Whole Foods. I put one whole package in the food processor.

Whirrr! I really like my food processor. It is so handy! 

Once the grahams were crumbed, I added one tablespoon of sugar and stirred it around.

In a medium sized bowl, I melted 1/3 cup of butter. I added all of my crumb mixture to the butter and stirred it with a fork. It seemed just right! And the girl was happy.

I put the graham mixture into a pie plate and patted it flat with the fork, and then used my finger to push the crumbs just up the sides. (Side? Does a round pie plate have sides or just one big side?)

I baked it at 375 degrees for 5 minutes.

The recipe calls for an 8oz. block of cream cheese, softened. I checked my cream cheese, because I did have one. Date? February, 2012. All righty then. I grabbed my plain Greek yogurt and used it instead. Do you know that 1 cup of Chobani Greek yogurt has 23 grams of protein? 23 GRAMS! 

Plop! Hello, Greek yogurt. You look harmless enough. We shall see how well you imitate cream cheese.

To the yogurt, I added 1/4 cup sugar and the 3 tablespoons of lime juice. Here is the very funny part. (It made me laugh, anyway.) This is where you are supposed to add the margarita mix. Since I made mine, and it was composed of 1/2 cup lime juice, 1/2 cup water, and 1/4 cup sugar, I basically used the exact same ingredients that I had already put in there. I don't know. I thought it was funny. Maybe it made a difference that the sugar had been dissolved in the water rather than mixed all together? The final ingredient was 1 cup of vanilla Greek yogurt. I did not have any. I had regular vanilla yogurt. I had plain Greek yogurt. I had full fat honey Greek yogurt. I did what any disaster prone resourceful person would do. I combined some of the plain Greek and the honey Greek to make one cup, and put it in my mixer! I blended all that together until it was smooth and then I poured it into my crust. The recipe says to put it in the freezer. This is what it looked like at the end of the day.

A pie you don't have to bake? Nice! I have yet to eat it, so I will have to update tomorrow. I had a milkshake this evening, for better or for worse, (likely for worse) so the pie will have to wait. I think it will be really delicious with some homemade whipped cream!

I'm a crazy kind of lazy, aren't I?


*Michaela and I both had some of the pie, and we agree that it is tasty, very limey, but would be even better with a dollop of whipped cream. I haven't been to the store to get cream, so...that is on my shopping list! I am sure that this would be very good if someone made it as the directions instruct as well. Because it was made with yogurt, it is very soft...the cream cheese, I'm sure, would give it a firmer texture.

Tuesday
May082012

Tortillas (The End)

I decided to make the tortillas again the next night, so we could have the meal we were supposed to have: shredded spicy beef on tortillas. 

So. Here is how the tortillas are supposed to come out, you know, when you don't stack them up before they are cooked and have to throw them away.

If you remember, the excellent cook must divide the wonderful elastic dough into eight equal(ish) parts. 

The next step is to roll each section out into a circle. Technically, it's supposed to be an 8" circle, however I roll them a bit bigger than that, because they definitely shrink a little while you are cooking them.

Or Michaela rolled them. It's always nice to have a helper!

Once you have a flat circle, pick it up gently and place it into your hot skillet. You don't need to put anything in the skillet if it's non-stick (mine is something fancy that I got for Christmas one year...I can't remember what it is, but it's not a regular non-stick) (I've never used Stainless so I cannot inform you on that one). You will notice that the tortillas starts to look drier in the center.

The first few tortillas were experimental, as far as figuring out how long to let them sit until flipping. The great thing is that you can just flip it again and let it continue to get golden. 

Because they are soooo elastic, they end up weird shapes. So, if you love dearly perfectly round tortillas then this might not be the recipe for you. Picking them up stretches them in funny ways. Cook them until they look done. (Nice and helpful, huh?) It's hard to mess it up. 

I will confess that Michaela rolled out a gigantic one, and I told her that it was fine since they shrunk in the pan. After I picked it up, it was especially huge, and so big, in fact, that it did not fit in the skillet. It flopped over on itself and being sticky, stuck. I ended up with one very odd, fat on one side, probably barely cooked through tortilla. But other than that, there were no major disasters! I called it a success, and not just because I avoided endangering lives with sharp objects. Everyone loved these tortillas, even Eliana! 

They are so good, a little chewy, soft, and just the right flavor. 

I just realized that I need to get the recipes in the posts...so, that is my next project! Ha! 

Friday
May042012

Tortillas (Casi)

Many years ago, a friend of mine gave me a recipe for tortillas. Shannon and her husband Jason were (and still are, I assume, even though I have not seen them in quite a while now, since seminary) great cooks, and they love fun, fresh food. I wish I shared their enthusiasm for many of the wonderful things they ate, however a love for tortillas was something that I did share. 

What I really love about this recipe is how simple it is. There are four ingredients and they are always on hand. I don't know why I don't make them more often. I am lazy is likely the number one reason. However, I make them for the same reason, so see if you can figure that out. I have to go to Whole Foods or Central Market in order to get tortillas that taste good and do not have hydrogenated oil, and I'm just not into going to two or three stores, especially when I'm getting one item in that extra store. I don't even like to go to one grocery store, much less drive around town for tortillas.

I confess that Central Market has some darn good tortillas, and they are almost worth an extra drive. Almost.

Early today I decided that we should have tortillas with the meat concoction I had thrown together in the crock pot. (I really don't know if crock pot is one word, two words, or hyphenated. Personal preference, maybe?) There was plenty of time to make the flour-y wonders, so I got busy.

I love that it is simple, and I also love that it is written out by my friend. That makes it extra special.

I measured out three cups of flour into my stand-up mixer. 

Do you know how to measure out flour? Use a spoon to put the flour in the one cup measuring cup, never shake the flour down, and then gently scrape across the top once there is a bit of a mound there. Don't shake your flour down into your measuring cup! You'll end up with too much. 

(What is funny about that is that I actually ended up adding a little later, but...better to be able to add later, than to have too much and not be able to remove it.)

I added 1/3 cup vegetable oil to my flour

and gently mixed it on low until the mixture was crumbly.

I put one cup of water in a liquid measuring cup, added some salt (I'll be honest...I just guessed on the amount), dissolved the salt, and then poured the salt water into my flour mixture.

That is a terrible picture. But it's not like I could do it again.

I turned the mixer back on low-medium speed and let it mix until the dough was elastic. My dough seemed very elastic-y, however, so I added a bit more flour. Probably about a quarter cup plus a tablespoon. It seemed good after that.

I covered it with a damp towel and let it sit for a while. (At least one hour, but I went and picked Christian up from school, and let it sit even longer after that.)

I went to pull the dough out of the bowl and thought it was still pretty sticky. I spread a pretty decent amount of flour on my cutting board and then pulled the dough out and rolled it around a little in the flour. It seemed just right. I was so excited this was going so well. I took my big knife and cut my dough into eight pieces. 

It was so soft and lovely. I could hardly wait to eat the tortillas! I rolled each one out. It was still a little early in the evening, but I thought I could get ahead of the game. I set each tortilla on wax paper, and layered them that way. I left them until the meat was ready, so that I could heat them up right before we ate. Yum!

When I went to pick up the top tortilla, it was completely stuck to the wax paper. I tried to scrape it off, thinking it was a bummer, but I would just have to reroll. Nope. The wax paper tore, and I couldn't even tell where dough ended and wax paper began. What you see below is the top wax paper, the second tortilla, and the next layer of wax paper. 

Nice and elastic, though, huh?

I was very sad. I had to throw the whole pile of tortillas and wax paper away. I actually had the thought halfway through my preparation,"Ha, ha, this recipe doesn't belong on 'Recipe for a Disaster'! It's going so smoothly!" 

Lesson: Never underestimate my ability to bring on the disaster.

By the way, "casi" means "almost" in Spanish. My tortillas that almost were delicious. 

Wednesday
Apr182012

Say Cheese(Pie)!

The recipes that end up on my blog will most likely be 1) Very Easy and 2) Foods My Kids Will Eat. The best of each of those things? Yes, please!

This is a recipe that can be found elsewhere on the Interwebs. It is called Easy Chocolate Lover's Cheesepie, and the first time I encountered it was in a set of trial recipe cards in the mail many years ago. I believe it is from Hershey's, but, ironically, I can only ever find Nestle mini-chips. This delicious dessert is one of the easiest things in the dessert world to make. There are very few ingredients, they whip together quickly, and bake. The frosting/icing/topping is actually ganache, which is also one of the simplest dessert toppings to make (and one of the most delectable). 

The necessities: three 8oz packages of cream cheese, 3/4 cups of sugar, 3 eggs, vanilla, mini semi-sweet chocolate chips, whipping cream. 

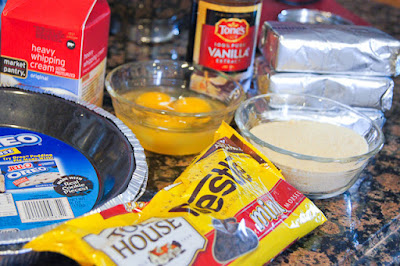
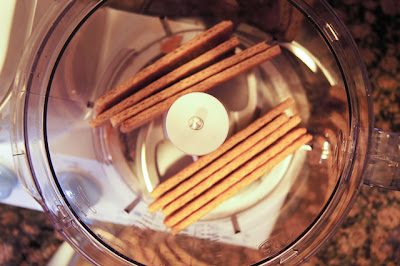
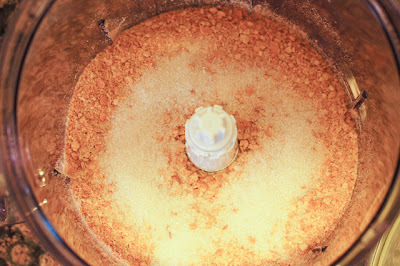
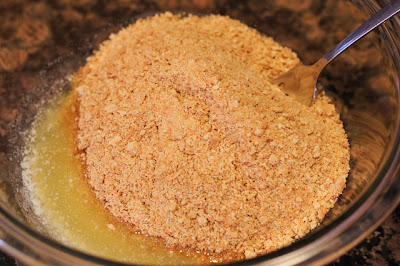
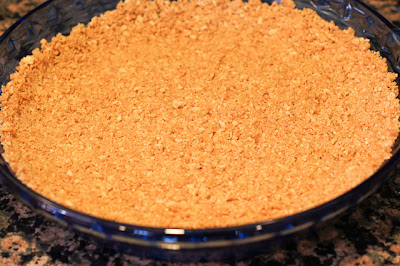
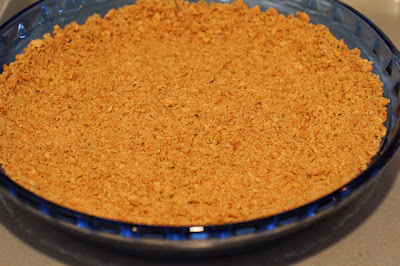
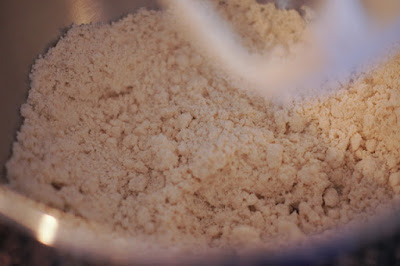
Now. In the picture are two Oreo pie crusts. These are optional. I mean, you definitely need pie crust(s), but not necessarily these. I have made my own very large crust, in an extra-big pie dish (it was my grandma's...very special) (I made a graham crust that time, from scratch, following the Better Homes and Gardens recipe, and it was amazing; just took longer) (duh). I have also used the graham and chocolate crusts from Whole Foods in the past; the Oreo crust is yummy and in my regular grocery store (Walmart), so that is the one I use most frequently these days. 

Have I confused you yet? If not, then that is unusual. When giving directions, I usually lose the person I'm directing immediately, as well as myself. 

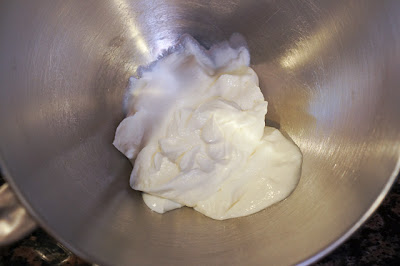
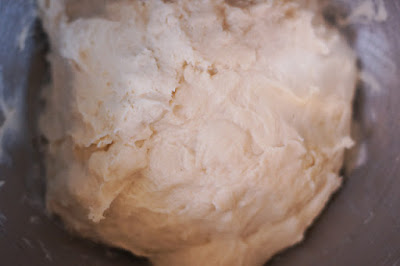
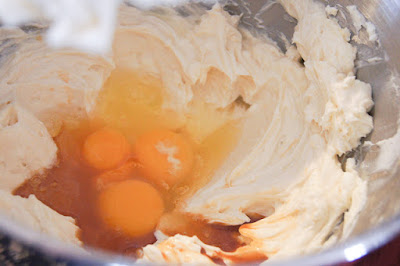
Beat the cream cheese and the sugar until thoroughly combined. I have used full fat cream cheese, name brand cream cheese, low fat cream cheese, store brand cream cheese, and a combination of all of those. I do not think there is a difference in taste, really, but I will admit that these particular pies were for an Easter lunch at someone else's house, so I went for the real deal (full fat) and the name brand (Philly). (They were SO GOOD.) Because of the high fat content, the mixture was super creamy; the previous time I had made the pies, the batter (batter?) was much lumpier. It ended up tasting fine when it was lumpy, but...I'm sure the fat made it easier to blend. Eating it was not a problem either way.

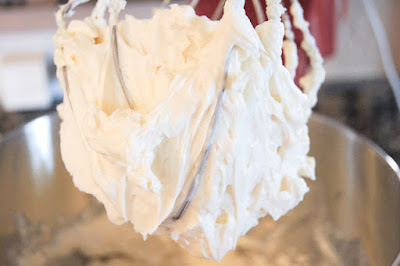
Add the eggs and blend well. I'm 98% sure that you are supposed to add one at a time and beat well after each addition. But...hello! Lazy. I do start out at a very low speed and slowly increase the speed to medium-high. Ask me how I know to do this. The answer likely has something to do with flour, my kitchen counter, and a lot of sighing. 

Once the eggs are mixed in, add all but one third of the chips. I have to confess. I never measure this part. I'm sure I did the first time, but now I just guess. I also make a lot of extra ganache for the top, so I'm not short. (To clarify: I am not speaking of my height. I don't want to be low on topping, see? The ganache has nothing to do with being short or tall. But it likely has a lot to do with me getting wider.)

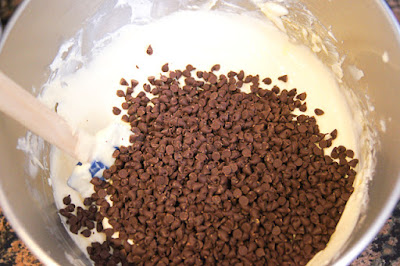
Stir the chips in gently and get ready to pour the mixture into your crust(s). (One extra-serving size crust, or two regular size crusts)

Since you are a disaster in the kitchen (okay, so I'm speaking of myself), realize that your crusts have broken packaging. Laugh, since you are writing a recipe for a blog section entitled "Recipe for Disaster". (I couldn't make this stuff up, nor could I have asked for things to go better for this wonderful area on my blog.) Since you have all the time in the world to waste, head back to the store with your crusts (and all of your children) in order to switch them out for crusts with intact packaging. But don't forget to put your cream cheese mixture in the fridge! (I did not forget! What a surprise, no?)

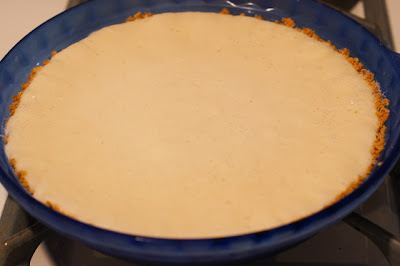
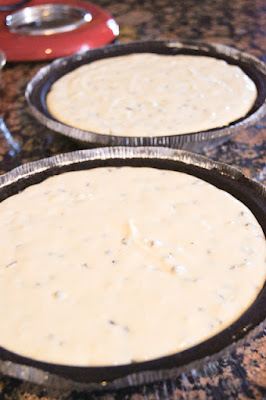
Once you are home again, fill your crusts with the mixture. 

Bake the pie(s) at 450o for 10 minutes and then turn your oven down to 250o. DO NOT OPEN THE DOOR AT THIS TIME. Let the pie(s) bake for another 30 minutes. I do the same time whether it is one or two pies, even though I'm sure they are different thicknesses. They come out looking all golden and lovely and immediately edible. 

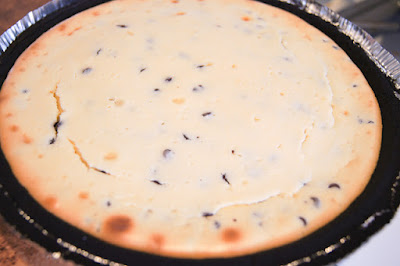
Resist the temptation to stick your face straight into the pie (especially if you have store-bought crusts...the sharp edges of the pie pan would really hurt you) (do not fear, I do not speak from experience on that one). The pie(s) are just about to get better. 

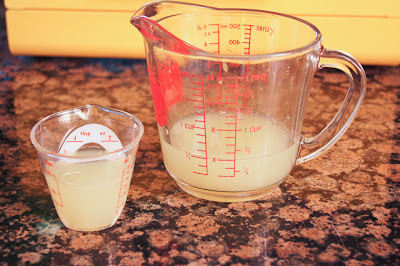
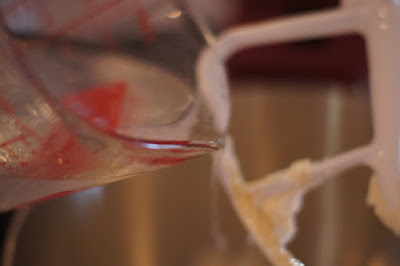
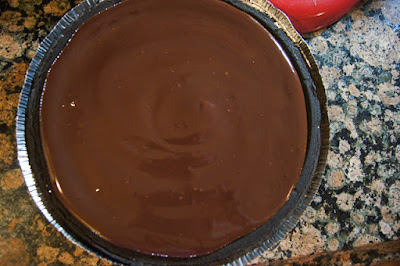
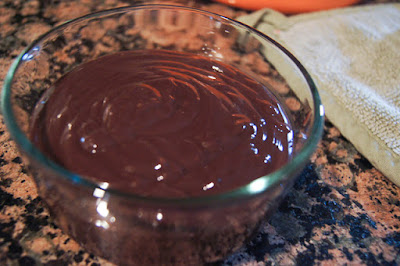
Here is where the recipe is very easy and I make it complicated (at least for blogging purposes). The real recipe says to microwave two tablespoons of whipping cream and the remaining chocolate chips on high for 30 seconds, let them sit for a minute, then stir to blend. For me, there is no way that that tiny bit of ganache is going to be enough for the two pies. (I honestly can't remember if that is what I did the first time I made it, one pie in the big dish. I think I did and it was fine. Now I almost always do two pies, and that tiny amount would never do.) I always make more than the recipe calls for. It is always a good idea. Since I do a larger amount, I do it on the stove top. I think I use two parts chocolate to one part cream. So, for one cup cream I would use two cups of chocolate. Or maybe one and a half cups chocolate. Accuracy! I'm on it!

The great thing about having more ganache than you need is that you can be generous! 
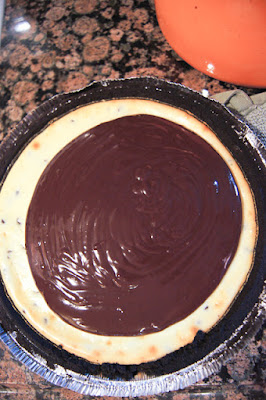
Isn't it so pretty? 

Guess what? It's as good to eat as it is to look at. This is a wonderful dessert to take to someone's house if you have the job of bringing a sweet. It is great to serve to guests in your home, and it is great to serve to your family as a special treat (Michaela often requests this pie). 

And what to do with the leftover ganache? Pour it in a bowl and drink it stick it in the fridge. You can use it in chocolate milk or make a cake and frost it or eat it with a spoon.

Oh! And don't forget to put your CheesePie in the fridge too. It must be served chilled, and of course, the leftover must be refrigerated. 

Don't count on leftovers, though.